Tetris is a relatively simple game to do. You have a grid and you draw rectangles on the canvas. It's a great start to creating a simple game. Collision detection is simple (albeit not that simple), there are no enemies or AI to take into account and you don't need any graphics. Of course you can make Tetris as fancy as you'd want but in general it's a very good game to start if you want to learn to write games.
Then Super Mario Bros is a good next step after Tetris. You'll know the basics of how to paint to grids and stuff and now you're ready to do spriting, continuous collision detection, grid editor, enemies, AI and that sort of thing. Kornel would make Tetris and I would do Mario. So we did. I created the game in about three days and I'd like to explain how I did it.
I've posted the game and the editor for your viewing pleasure ;)
Since I did not want to craft levels hard-coded I figured I'd create an editor first. The rendering engine from the editor could then serve as a basis for the actual game. Creating the editor took me about one day.
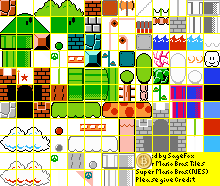
You start with finding some sprite maps for Mario on the web. You don't really need them for the initial process, but it gives you a much better impression to what you're doing. I found my sprites at neuropod.net, which included all the mario sprites, enemy sprites and background tiles. This source did not have the item sprites, but I found those later somewhere else. I edited the sprite maps to add transparency and make them easier to sprite (put all Mario's in a single row).
For the editor, we only focus on the background tiles. They are all 16x16 pixels with one pixel in between. We create a canvas to draw the background tiles on and an array that governs which coordinate gets which tile from the sprite map. In my code I used a single dimensional array but you could easily replace that with a double array. The main differences are that for a one dimensional array you don't have to do any initialization of the actual array. Just treat undefined positions as empty and you're fine. For two dimensional arrays you need to create an array for each row (or column). The downside to a single array is that you need to compute the xy from and to the index every time, which you don't have to do for a two dimensional array. A downside is that exporting the two dimensional array takes more work than a single array. Anyways, we can abstract the multiplications away and performance is not really an issue at the moment.
Our initial (singleton) code looks something like this:
Code: (JS)
// size details about various aspects of the game
var size = {
	tile: { // size of tiles
		source: {w:16, h:16},
		target: {w:16, h:16}
	}
	tiles: { // number of tiles
		source: {w:13, h:11},
		target: {w:30, h:30}
	},
	canvas: {w:null, h:null} // initialize later
};

// load the source image. technically you should wait for it to finish loading, but we'll be lazy in that regard right now...
var spriteMap = new Image;
spriteMap.src = 'background.png'; // or whatever the name of the sprite map image is

// canvas details
var canvas = document.getElementById('background-canvas');
// this is the handle we need to paint on the canvas. we dont really use the canvas object after the initialization phase
var ctx = canvas.getContext('2d');

// convert between index and xy on the map
var toIndex: function(x,y, boolSource){
	if (boolSource) return (y*size.tiles.source.w)+x;
	return (y*size.tiles.target.w)+x;
};
var toXY: function(index, boolSource){
	if (boolSource) return {x:index%size.tiles.source.w, y:Math.floor(index/size.tiles.source.w};
	return {x:index%size.tiles.target.w, y:Math.floor(index/size.tiles.target.w};
};

// each element in the array tells you which sprite in the sprite map should be drawn, if any.
// 0 means none so we offset at 1, meaning we should deduct one from the index
var backgroundMap = [
	1,0,0,5,6,7,0,0,0,0,... etc
	1,0,0,8,8,8,0,0,0,0,... etc
	... etc
];
That's the basics for our background layer. Now let's move on to the drawing. Drawing is relatively very easy. You the main drawing method for getting images on the canvas is
drawImage. It's an overloaded method which takes a variating number of parameters, depending on what you want to do. Since we want to take a slice from the source image and paint that in a target position, possibly resized, we use the fingerprint of drawImage(img, sx, sy, sw, sh, tx, ty, tw, th). For debugging you could also draw a rectangle around your sprite, for this you would use
strokeRect(x,y,w,h) and optionally change the color by changing the strokeStyle property.To clear the canvas we use the
clearRect method. Alternatively you could also resize the canvas or fill the page with the background color. Although the latter is a bit silly because you could just as well set a background color to the canvas element with css.Code: (JS)
var repaint = function(currentFrame){
	// clear the canvas before repainting
	ctx.clearRect(0, 0, size.canvas.w, size.canvas.h);

	// loop through the background tile data
	backgroundMap.forEach(function(sourceIndex, targetIndex){
		// get source and target coordinates
		var src = toXY(sourceIndex, true);
		var tgt = toXY(targetIndex, false);
		// cache tile sizes
		var sw = size.tile.source.w
		var sh = size.tile.source.h;
		var tw = size.tile.target.w;
		var th = size.tile.target.h;
		// actually paint
		ctx.drawImage(
			spriteMap,
			src.x * sw,
			src.y * sh,
			sw,
			sh,
			tgt.x * tw,
			tgt.y * th,
			tw,
			th
		);
		// and maybe the rectangle (using pretty much the same target parameters)
		ctx.strokeRect(
			tgt.x * tw,
			tgt.y * th,
			tw,
			th
		);
	});
};
The repaint method should, at least for now, be called at a certain interval. At the time of interval, a flag could determine whether the layer should be redrawn.
We use
setTimeout over setInterval (even if that would make more sense) because setInterval tends to congest if the browser thread locks up. The callbacks will be queued and fired at once when the thread clears. This is not the case for setTimeout because we queue a new callback only when the previous calback fired.Note that we also want to make sure the timer doesn't stop if an error happens. Of course, no error should occur but we an easily prevent a full game stop by making use of the
try { ... } finally { ... } construct. You might have seen try {} catch(e){} in code. This is very similar. In js the finally block will be executed regardless of what happened in the try block. That includes an error being thrown or explicitly returning. We can use that mechanism to ensure our timer is rescheduled after every frame.Code:
var start = function(){
	// frame counter
	var frames = 0;
	setTimeout(function frame(){
		try {
			if (backgroundMap.repaint !== false) {
				repaint(++frames);
				backgroundMap.repaint = false;
			}
		} finally {
			setTimeout(frame, 50);
		}
	}, 50);
};
This code will try to run the repaint function every 50ms (about 20fps). This is not a guaranteed interval, but for our game it will suffice.
For an editor, your next step is to display each individual tile, make them selectable and somehow allow the user to change the backgroundMap array by changing the map visually. It is kind of trivial to do so. You mainly have to translate mouse position on the canvas back to x/y on your grid. On mouse down you replace data in the backgroundMap with the selected tile. The repaint loop will take care of the rest and show you the new map immediately.
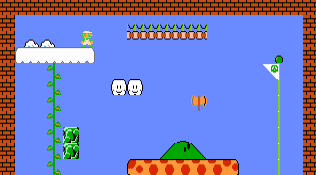
The next step is to create something that accepts input and moves accordingly. We call this a sprite or actor. Let's start by creating an object that simply holds the curent position and size of the actor. We use the character sprite map from ... and put them in a predictable pattern. The size of the character sprites we use are 16x32 px, even though much of that is transparent.
Code: (JS)
var player = {
	pos: {x: 0, y: 0},
	size: {w: 16, h: 32}
};
player.spriteMap = new Image;
player.spriteMap.src = 'mario-sprites.png'; // or whatever it is

// create an array to hold all actors
var actors = [player];
Now to prevent having to repaint the entire background whenever something changes for an actor, we'll use a separate layer for actors. We add a snippet of code to the repaint loop that handles painting the actors.
Code: (JS)
// get the canvas layer
var actorCanvas = document.getElementById('actor-canvas');
var actorCtx = actorCanvas.getContext('2d');

// and this goes in the repaint loop, after the background painting loop
// actors basically always get repainted. the performance hit is not very significant and it's very likely something changes a lot
actorCtx.clearRect(0, 0, size.canvas.w, size.canvas.h);
// repaint each actor
actors.forEach(function(actor){
	actorCtx.drawImage(
		actor.spriteMap,
		0,
		0,
		actor.size.w,
		actor.size.h,
		actor.pos.x,
		actor.pos.y,
		actor.size.w,
		actor.size.h
	);
	// you could draw a rectangle around it if you want, just like before...
});
So now we have a static image that we can position anywhere on the map. Whenever we change player.pos, the repaint function will automatically pick up the changes and paint the character in the correct position. Of course, we need to be able to move the player. For that we need to listen to keyboard and/or mouse events. Obviously we'll listen to keyboard events for Mario.
We listen to keydown events because we want to react whenever somebody presses a button. The button might be held so listening for keyup is not very usefull right now.
Let's start by simply changing the position whenever a key is down. It's not the best way to go, but we'll take this step by step :)
Code: (JS)
window.onkeydown = function(e){
	switch (e.keyCode) {
		case 37: // left
			player.pos.x -= 3;
			break;
		case 38: // up
			player.pos.y -= 3;
			break;
		case 39: // right
			player.pos.x += 3;
			break;
		case 40: // down
			player.pos.y += 3;
			break;
		default:
			return;
	}
	return false; // cancel regular key
};
As you can see you can now move Mario around by pressing the arrow keys. But as you can also see, holding any arrow key will move Mario once, then pause and then start moving Mario continuously. This is caused by a hardware delay in resending the keydown event by your keyboard. This is something you cannot fix, not even on the browser or operating system level. This is a hardware setting in your BIOS, which you probably shouldn't change either ;)
To get around this problem we will no longer update when you press a key, but rather we'll track which keys you are holding down and update things on every frame, depending on which keys are marked as being held down. This gives a more intuitive feeling to how movement works.
Code: (JS)
// replace the onkeydown code above with the following...

// create an object that tracks keys being held
// no need for initialization, only true means the button is held
var held = {};

window.onkeydown = function(e){
	switch (e.keyCode) {
		case 37: // left
			held.left = true;
			break;
		case 38: // up
			held.up = true;
			break;
		case 39: // right
			held.right = true;
			break;
		case 40: // down
			held.down = true;
			break;
		default:
			return;
	}
	return false; // cancel regular key
};
// of course we now also need to register keyup
window.onkeydown = function(e){
	switch (e.keyCode) {
		case 37: // left
			held.left = false;
			break;
		case 38: // up
			held.up = false;
			break;
		case 39: // right
			held.right = false;
			break;
		case 40: // down
			held.down = false;
			break;
		default:
			return;
	}
	return false; // cancel regular key
};
// and have a function that's called on every
// interval to update the game for held keys
var handleInput = function(){
	if (held.left) {
		player.pos.left -= 3;
	} else if (held.right) {
		player.pos.right += 3;
	}
	if (held.up) {
		player.pos.up -= 3;
	} else if (held.down) {
		player.pos.down += 3;
	}
};
And if you run the game now you'll find that you can indeed hold a key and the pause is gone. Mario will keep on moving as long as you hold the button. There is the off chance of a desync (where the game thinks a key is down when it is in fact up), but that's not really a problem for keyboard input. It could be for mouse input, especially if you hold the mouse button in an area that tracks mouse down and up, but release it outside of that area. Anyways, don't worry about it :)
Let's improve movement and give it a slightly more realistic feeling. The way we do that is by defining a velocity in any direction and updating the position based on the current velocity. Holding a key will update the current velocity rather than the the position directly. By updating the position through the current velocity the player gets a more natural incremental and decremental movement. You won't immediately move at full speed, but rather it builds up. Of course we need to cap the speed to prevent a player from warping five screens per frame :)
For the simple model, we'll add the values for velocity directly to the current position on every frame. After we do that we decrease the horizontal speed to simulate friction. We increment the vertical velocity (causing a downward movement) to simulate gravity. When a character is standing on a solid tile, or hits a solid tile while going up, the vertical velocity is set to zero. When the horizontal velocity is smaller than a certain threshold it is set to zero as well.
Code: (JS)
// player gets an extra property; speed (I prefer speed over velocity)
player.speed = {x:0, y:0};

// handleInput now manipulates the speed rather than the position
// note that the amounts also change because we're now manipulating speed
var handleInput = function(){
	if (held.left) {
		player.speed.left -= 0.5;
	} else if (held.right) {
		player.speed.right += 0.5;
	}
	if (held.up) {
		player.speed.up -= 15;
	} else if (held.down) {
		// this only causes a duck animation, nothing happens in term of speed
	}
};

// and right before painting the actors in the repaint loop, apply speed, friction and gravity.
// the new position is then immediately reflected in the drawImage call that follows it.
actor.pos.speed.x *= 0.9;
if (actor.pos.speed.x < 0.001) actor.pos.speed.x = 0;
actor.pos.x += actor.pos.speed.x;
actor.pos.speed.y += 3;
actor.pos.y += actor.pos.speed.y;
And now you'll see a player falling down. Kind of dumb, right. You can of course disable the gravity to see the effect for horizontal movement. You can tweak the friction and gravity if you don't think this feels right. Likewise you can tweak the impulses given on input to make the player move faster or jump higher if you'd want to. To make a lunar mode, for instance, you increase the impulse given to
player.speed.y and decrease the amount of gravity applied on each frame.Now that the actor can actually move around, the next step is to create a collision map and do some collision detection. Collision detection is actually much harder in Mario than it is in Tetris. The main difference is that in Tetris, you only have direct horizontal, vertical (and maybe diagonal) movement. So you only had four or eight directions you needed to check for on a fixed grid. In Mario you have a continuous position with a randomly sized object to check which makes these rules slightly more complex.

Another factor that might wreak havoc is velocity. What happens if a player can actually go "faster" than a single tile? So what if the player can skip an entire cell on the grid between frames. If that happens you will also have to check all cells between start and end point. That's ok if you go straight horizontally or vertically, but Mario will usually move in all directions while jumping or falling.

We mitigate the velocity factor by maxing the speed of the player at one tile. In fact, it's less than a tile, so it fits for our game. But there are games where you can't really get away with it. In those games you'll have to dive much deeper into collision detection algorithms.
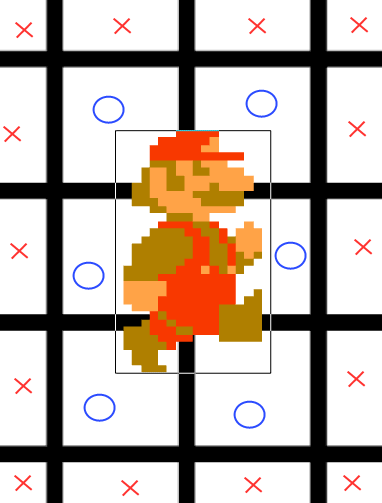
In Mario, we will check the hitbox of Mario (which has a continuous range, it can be midway inside two tiles) with the coordinates of all tiles it overlaps with. We do this for every frame, in all three directions that affect the current velocity vector (which is actually the direction). That means we check horizontals, verticals and diagonals. Since Mario's speed cannot exceed one tile, we won't have to worry about warping through blocks. It's impossible.
Checking for collisions with enemies is actually much easier. Or rather, we take the easier approach. We simply check whether Mario's hitbox collides with that of an enemy or object. For static enemies and objects this is no problem. Since Mario can never move more than one tile at once it can never "warp" through such a hitbox. Any part of the straight path Mario takes from A to B will at least be covered by some part of Mario in some frame. So if that path contains another hitbox, at some frame it will be detected to be hit. Of course it's not that easy for moving targets. If Mario and some enemy move in opposite directions, the theory above won't hold any more. In mario, though, we won't bother with this problem :) It's not really an issue because enemies don't move that fast and neither does Mario.
Let's try to implement the simple collision algorithm. We take the next proposed position of Mario. We check all tiles Mario would cover at the new position. We start at the top-left corner of Mario's hitbox and move line-by-line to the bottom-right corner. For every tile we check whether it is blocking. If any such tile blocks, the move is blocked and at least one and maybe both of the velocity parameters need to be reset. In case of a tie, we'll remove the vertical speed first.
Code: (JS)
var blocks = function(x, y){
	// get corner coordinates in tile coordinates
	var tl = {
		x: Math.floor(x/size.tile.w),
		y: Math.floor(y/size.tile.h)
	};
	var br = {
		x: Math.ceil(x/size.tile.w) + 1,
		y: Math.ceil(y/size.tile.h) + 1
	};
	// loop through all blocks in this rectangle
	// note that the bottom right coords are exclusive
	// this solves an important problem when the sprite
	// has the same size as the grid.
	for (var x=tl.x; x<br.x; ++x) {
		for (var y=tl.y; y<br.y; ++y) {
			if (backgroundMap[toIndex(x,y)]) return true;
		}
	}
	// none of the tiles blocked, move is ok
	return false;
};
var nextMove = function(actor){
	// first check if its blocking at all
	if (blocks(actor.pos.x + actor.speed.x, actor.pos.y + actor.speed.y)) {
		if (!actor.speed.x && !actor.speed.y) throw 'Error, current position is blocking, why?';
		// if it was blocking, see if it blocking vertically
		// if so, reset the vertical speed and try again
		if (blocks(actor.pos.x, actor.pos.y + actor.speed.y)) actor.speed.y = 0;
		// otherwise reset the horizontal speed and try again
		else actor.speed.x = 0;
		// try again, with at least one speed parameter cleared.
		// unless the current position blocks, worst case nextMove
		// is called twice and clears both speed parameters.
		nextMove(actor);
	} else {
		actor.pos.x += actor.speed.x;
		actor.pos.y += actor.speed.y;
	}
};
If you create a grid that has some tiles defined below the starting point of Mario, that should cause Mario to fall right onto the block. But what you'll probably see is that he doesn't stop right on top of the block, but slightly above it. Only to hover down after that. If you don't see the effect, jump around a little. This is because we do stop the speed, but there is still some distance between Mario and the blocking tile. And since you always get some gravity added, the smaller speed will cause Mario to move closer to the wall. Up until the point where either Mario hits the tile directly or any distance smaller than the gravity adds to speed.
To fix that problem we need to alter the nextMove function. It also needs to position Mario exactly next to the tile that blocks it whenever a speed parameter gets reset. This can be a bit tricky though. For the top and left you floor the current x or y (in grid coordinates) and set Mario to that position. For right and bottom you need to take the x and y (in grid coordinates), add the width or height (relative in grid size..) to the position, ceil that value and then subtract the width or height from the result again. That will be Mario's new position.
Code:
var nextMove = function(actor){
	// first check if its blocking at all
	if (blocks(actor.pos.x + actor.speed.x, actor.pos.y + actor.speed.y)) {
		if (!actor.speed.x && !actor.speed.y) throw 'Error, current position is blocking, why?';
		// if it was blocking, see if it blocking vertically
		if (blocks(actor.pos.x, actor.pos.y + actor.speed.y)) {
			// put the actor next to the block... direction matters
			if (actor.speed.y < 0) {
				actor.pos.y = Math.ceil(actor.pos.y + actor.speed.y);
			} else {
				actor.pos.y = Math.floor(actor.pos.y + actor.size.h + actor.speed.y);
			}
			// and now reset the vertical speed
			actor.speed.y = 0;
		} else {
			// put the actor next to the block... direction matters
			if (actor.speed.x < 0) {
				actor.pos.x = Math.ceil(actor.pos.x + actor.speed.x);
			} else {
				actor.pos.x = Math.floor(actor.pos.x + actor.size.w + actor.speed.x);
			}
			// reset the horizontal speed and try again
			actor.speed.x = 0;
		}
		// try again, with at least one speed parameter cleared.
		// unless the current position blocks, worst case nextMove
		// is called twice and clears both speed parameters.
		nextMove(actor);
	} else {
		actor.pos.x += actor.speed.x;
		actor.pos.y += actor.speed.y;
	}
};
So this gives us a simple Mario game. Of course, it's more like a generic game with Mario sprites. You could easily replace the sprite maps with other animations. In that regard it's just a theme. It becomes a Mario game when you incorporate typical actions like mushrooms, stars and breakable blocks. But these things should not be that difficult at this point.
In my version I used a separate layer for checking which tiles block. This allows you to define certain semantic regions while still having the freedom of putting background tiles where ever you would like to without at the same time defining these regions. This would allow for secret entrances for instance.
You can find the resulting game on mario.qfox.nl and hack on it from there. The editor uses pretty much the same code base.
Maybe I'll devote another blog post for improvements to this game, later. I haven't even covered stuff like animations or scrolling.
Oh that's right. We used a google doc for sharing our live coding. The result of the second day of Mario is still there. Below it is a simple parallax demo I whipped up in the last fifteen minutes while Kornel explained some network code ;) You can find it at http://js.gd/1qa.